Step 6 Connecting and Testing
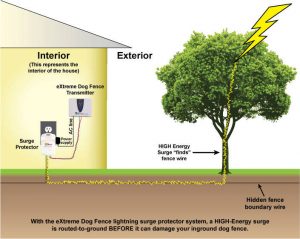
Here is the last step. Connect the wires to the surge protector (if you have one) and to your dog fence transmitter. Plug in the transmitter to power it on.
If you are getting a constant beeping from the transmitter, never fear. In most cases if the transmitter is alarming, it is because where you spliced your wire isn’t secure enough. Check everywhere that you have joined your wires together. After fixing your splices, if the transmitter is still beeping, it is time to hunt down where your wire could be broken. Read through our section on finding a break in the dog fence wire and follow those instructions.
Now it is time to program your transmitter. Here is a video on how to do that. In addition to the collar correction level, you also need to set the boundary zone on your transmitter, to register how close to your dog fence wire that you want your dog to receive the beep and correction. After this is set, it is time to place your flags.
You want to place your flags in the location of where the beep and correction is happening, as opposed to placing them on top of the wire. These flags help your dog understand exactly where the correction will happen, if he crosses where the flags are placed.
To see where the beep is happening, simply take your collar outside (but keep your hands off of the probes) and walk toward your dog fence wire. Hold the collar at the approximate height of your dog’s head. Move closer toward your boundary wire until you hear the beeping. Use your collar as your guide to set your boundary flags in the location where the beep is happening. Place one flag approximately every 10 feet. For places where you can’t plant the flags (such as on the driveway), you can just lay them down on the ground.
Congratulate yourself on a job well-done! Take a rest. Then, when you are ready, let’s get started on the most important aspect, which is training your dogs so that they understand the system.


